 SokuPhoto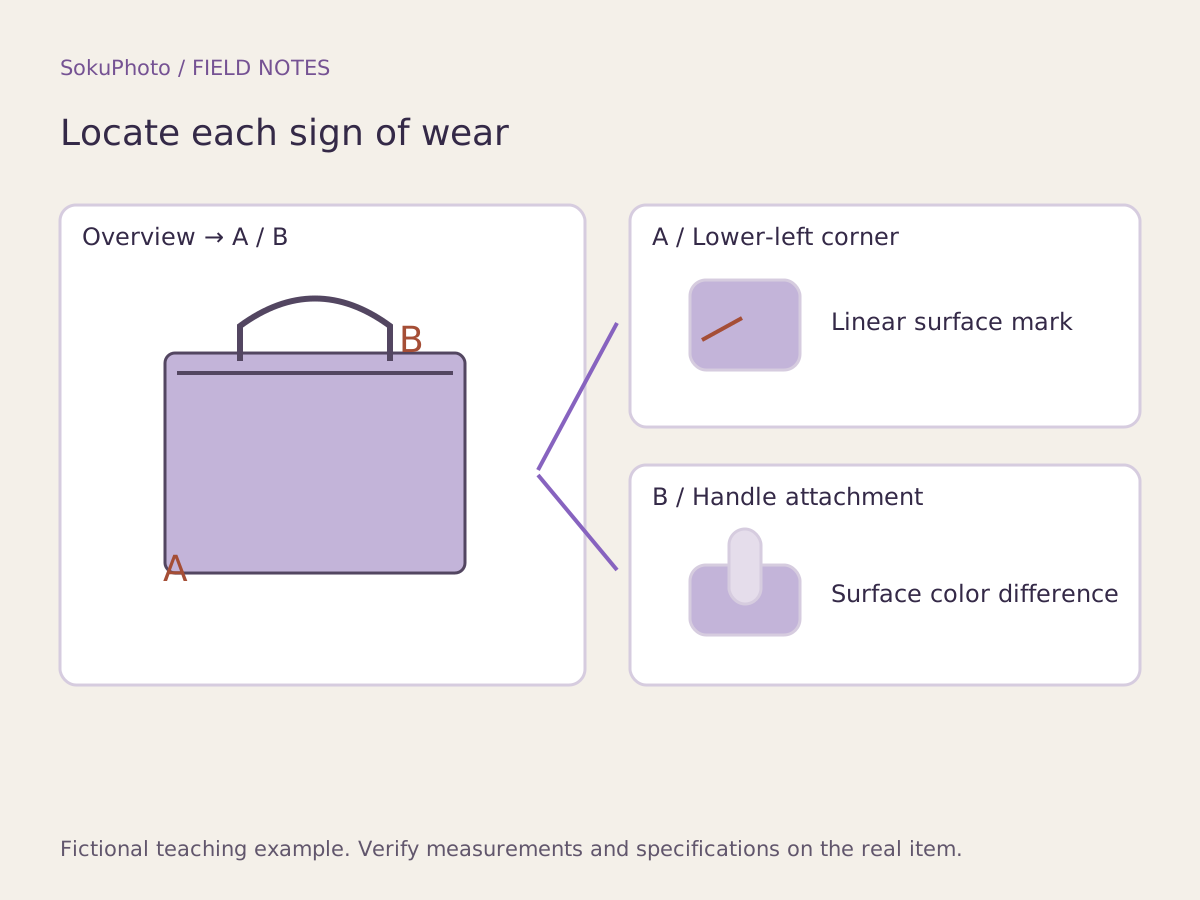
Start with overall photos of the exact item for sale
First photograph overall views, such as the front, back, base, and interior, that identify the exact item you are selling. Photos of a new item of the same model or another individual item do not describe its condition. Add identifiers to your work log so you can later tell which surface each mark is on.
eBay's picture policy does not allow stock photos for used, damaged, or defective items, or images that inaccurately represent the product. It also restricts added text and graphics. The annotated diagram in this article is for planning your explanation, not a recommendation to upload it directly to eBay.
Connect overall view A → area A → close-up A
In the explanatory diagram, A is the lower-left corner of the bag's front and B is the attachment point of the handle on the right. This is a fictional line drawing, not a photograph documenting damage to an actual used item. In practice, prepare 3 views: an overall photo locating the mark, a medium shot showing its surroundings, and a close-up showing the surface.
| Photo ID / location | Example observation | Measurement | Unverified details |
|---|---|---|---|
| F01→A01→A02 / lower-left front corner | A linear mark is visible on the surface | Enter length and unit after measuring | Cause is unknown |
| F01→B01→B02 / right handle attachment | An area of the surface has lighter color | Measured extent: unknown | Do not infer strength or load capacity from photos |
Separate visible facts from assumptions
A linear mark on the lower-left corner is different from damage caused by dropping the item. You cannot state the latter unless you know the cause. Similarly, a visible zipper is not evidence that it works properly, so record separately whether you have tested it.
Add measured lengths, photographed locations, verification dates, and similar details to the product description. Annotate images only where the listing platform permits it, and keep the originals. Where added graphics are restricted, as on eBay, connect the images through their order and the description rather than drawing numbers onto them.
Add details to explanatory images where annotations are allowed →
Clean up the background without changing the item's condition
Removing debris from a table or tidying a cluttered background is different from erasing wear on the product. If a background cutout removes a chipped corner or generative editing smooths a scratch, do not use that result to describe condition. Tidying the actual background and taking another photograph may be more appropriate.
Changing the lighting angle can reveal fine marks, but include a normal overall photo alongside revealing close-ups so they do not exaggerate the item's overall condition. SokuPhoto does not certify the condition of used goods. Before publishing, compare the final photos against the exact item for sale.
Improve the background without changing the item's condition →
Before you publish
- The photos show the exact item for sale.
- The locations of details A and B are clear in the overall view.
- Observations, measurements, and unknown details are separated.
- Scratches and wear have been preserved, and the platform's annotation rules have been checked.
Sources & editorial notes
Original workflows, examples and diagrams by SokuPhoto. Fictional examples are not customer results. Verify the actual product and destination requirements before publishing. Sources reviewed: 2026-09-17.